Play is an integral piece of childhood. However, a child’s disability may present barriers which limits their access to play. Through the use of assistive technology such as switches and switch adapted toys, people with motor disabilities such as cerebral palsy, can experience independence with environmental interactions. Switch adapted toys are toys that have been modified so the original switches are rerouted to a larger switch that is easily accessible and easy to operate. Depending on your child’s particular challenges, the new switch may be a finger switch, foot switch or button switch of varying size and material. Benefits of playing with switch-adapted toys ● Skill practice – hand and eye coordination, visual targeting are all skills promoted with switch-adapted toys ● Promoting access to augmentative and alternative communication ● Fostering confidence ● Social participation
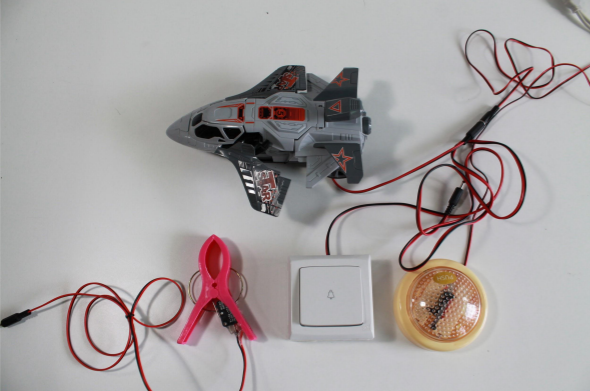
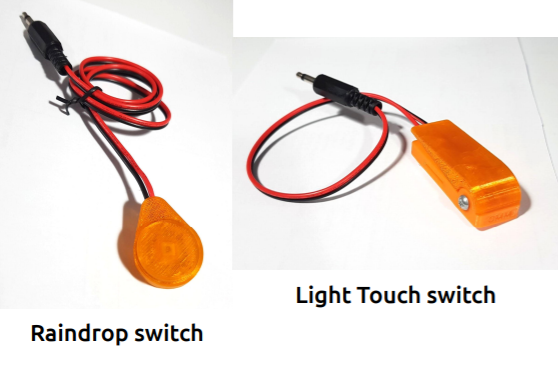
Thank you for helping us help the less fortunate by creating tools for them to use! In this workshop we aim to build a switch for children with disabilities so that they can operate toys more easily. The switches come in 2 varieties: Raindrop switch and Light Touch switch.
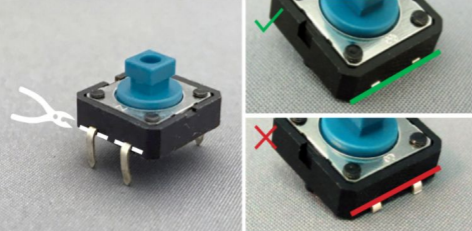
Prepare push button switch
Step 1: Cut the 2 leads on one side of the switch flush
Step 2: Straighten the 2 leads on the opposite side.
Step 3: Check for plastic mounting lugs – if there aren’t any on your push button switch, skip this step. Cut off the 2 plastic mounting lugs completely flush.
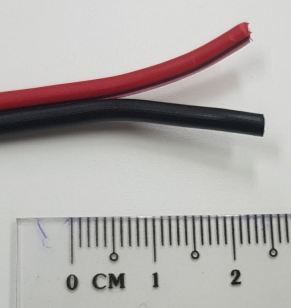
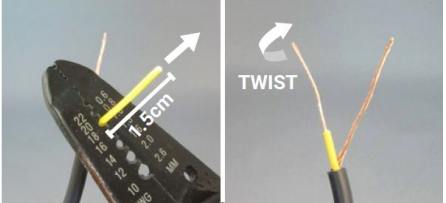
Prepare wires
Step 1: Take the wire, separate the black and red wire at one end for about 2 cm.
Step 2: Using the wire stripper, clamp the wire at the 1.0 mm notch, about 1 cm deep (leave slightly more insulation on the black wire). Pull to separate insulation from the wire. If using the strip gun, clamp the wire and pull the trigger quickly.
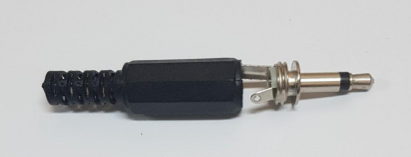
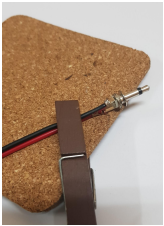
Prepare audio jack
Step 1: Unscrew audio jack (grip pin with one hand and the shell in another, then turn in opposite directions).
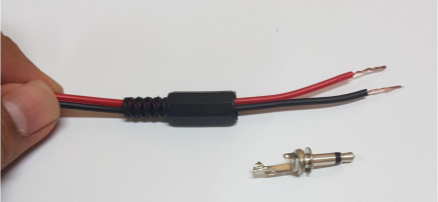
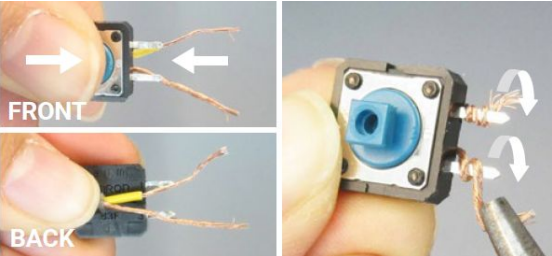
Step 2: Thread the stripped end of the wire through the shell.
Connect wires and audio jack
Step 3 : Place the soldering iron in its stand and plug it in. Moisten the sponge. Wait for the soldering iron to heat up.
Step 4: Pass RED wire through taller leg and wrap wire around the hole. Make sure the red and black wires are not touching, otherwise there may be short circuit issues.
Soldering
Step 1: Place the soldering iron in its stand and plug it in. Moisten the sponge. Wait for the soldering iron to heat up.
Step 2: Solder the BLACK wire. Make sure the solder covers and firmly attaches the wires to the audio jack. Repeat on the RED wire, making sure that the RED and BLACK wires remain separated (solder on BLACK wire is not fused together with the solder on RED wire).
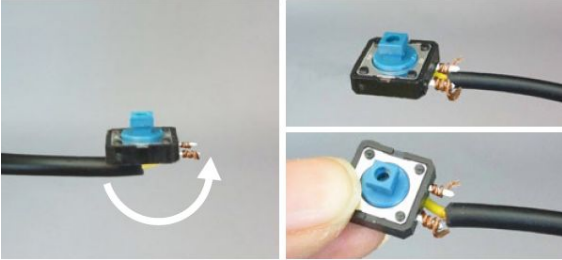
Connect wires and switches
Step 1 (Rainbow Switch): Thread the other end of the wires through the hole on the 3D printed base. For Light Touch switch, skip to Step 2.
Step 2: Separate black and red wires, and strip each end, about 1.5 – 2 cm.
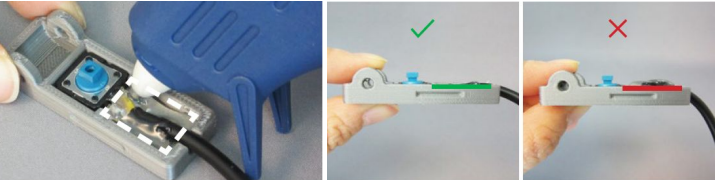
Step 3: Hold the wires at the base/back of the switch. Wrap the exposed portion around the switch leads. Make sure black and red wires are not touching.
Step 4: Bend to wires to the opposite side such that the wires are now in between the two switch leads.
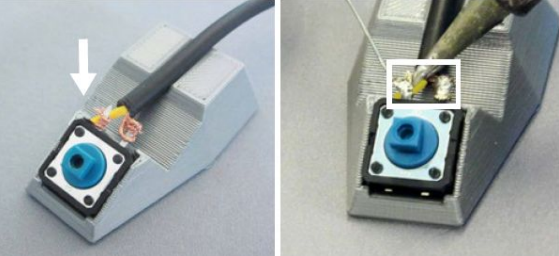
Soldering again
Step 1: Place the switch and wires on the soldering guide. Solder the two leads.
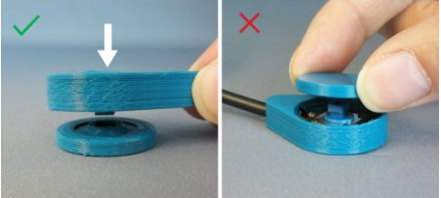
Assembly (Raindrop switch)
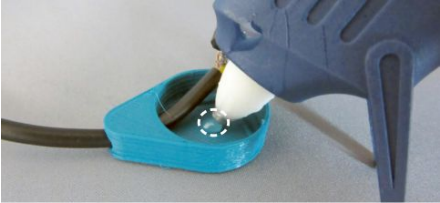
Step 1: Move the case close to the switch.
Step 2: Add a small drop of hot glue to the centre of the 3D printed base. Do NOT add too much.
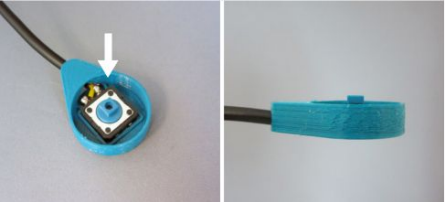
Step 3: Make sure the switch is sitting flat and level.
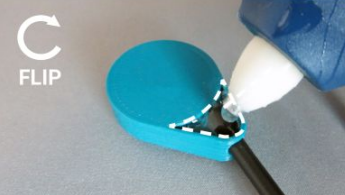
Step 4: Add a small drop of hot glue to the square recess of the 3D printed cap. Do NOT add too much.
Step 5: Press the 3D printed base assembly against the cap to prevent the hot glue in the cap from oozing downwards.
Step 6: Fill the hole at the bottom of the 3D printed base with hot glue.
Assembly (Light Touch switch)
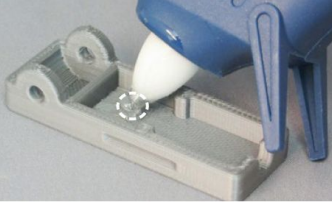
Step 1: Add a small drop of hot glue to the 3D Make sure the switch is sitting flat and level. Do NOT add too much.
Step 2: Make sure the switch is sitting flat and level.
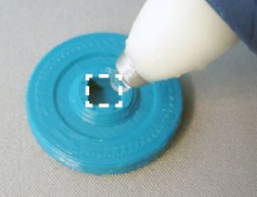
Step 3: Fill the 3D printed base with hot glue. Do NOT overfill.
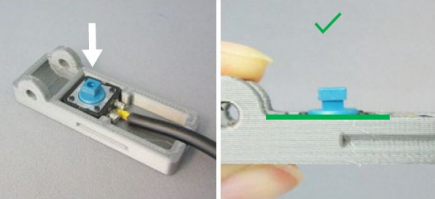
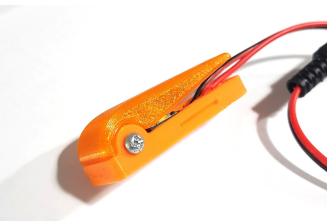
Step 4: Attach the 3D printed cap to the base and secure the joint with a bolt.
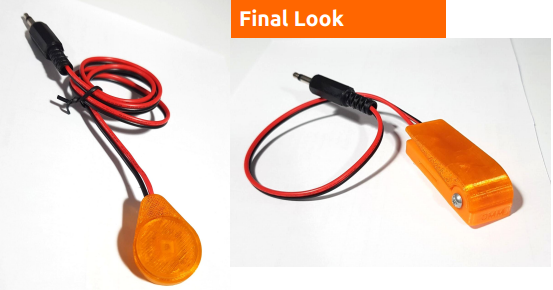
Completed Switches
And you’re done! Try it out!
Quality Check!
TEST: Connect your switch to the toy via the audio jack.
ACTIVATE: Press on your switch to turn the toy on!
THE OUTCOME: The toy should only turn on after you have pressed your switch and it must turn off after releasing the switch. The switch should also return back to its original position and not remained pressed down.