Speaking Induction hob / hotplate
| Status | In progress |
|---|---|
| URL | |
| Assign | |
| Project Page | |
| Problem Statement | |
| Collaboration | Fortitude Culina |
Project Information

Project Summary
Beneficiary Organization approached Engineering Good (EG), requesting an affordable hotplate that is custom designed for the visually impaired in mind.
https://enablingvillage.sg/2018/04/19/6-tools-that-belong-in-every-blind-persons-kitchen/
There is already a commercial product available in the market, however it is a bit pricey and rather old - it possesses several design flaws many parties feel should be rectified.
EG accepted this project with the intention that any and all modifications made are cheap and open-source (as follows EG's core principle), so that any and all makerspaces are able to replicate EG's creation for the benefit of others.
For the sake of ease and cost, EG has decided to procure an affordable hotplate and will modify it to include whatever requested features that are not already present.
Product already present in the Market (to be replaced)
COBOLT SpeechMaster


This stove reads its settings out loud as you set the temperature. It has safety features such as turning off after a preset period, and a magnetized base for stainless steel pans and pots. The hob also turns off immediately when a pan is removed.
Product to be Modified by Engineering Good
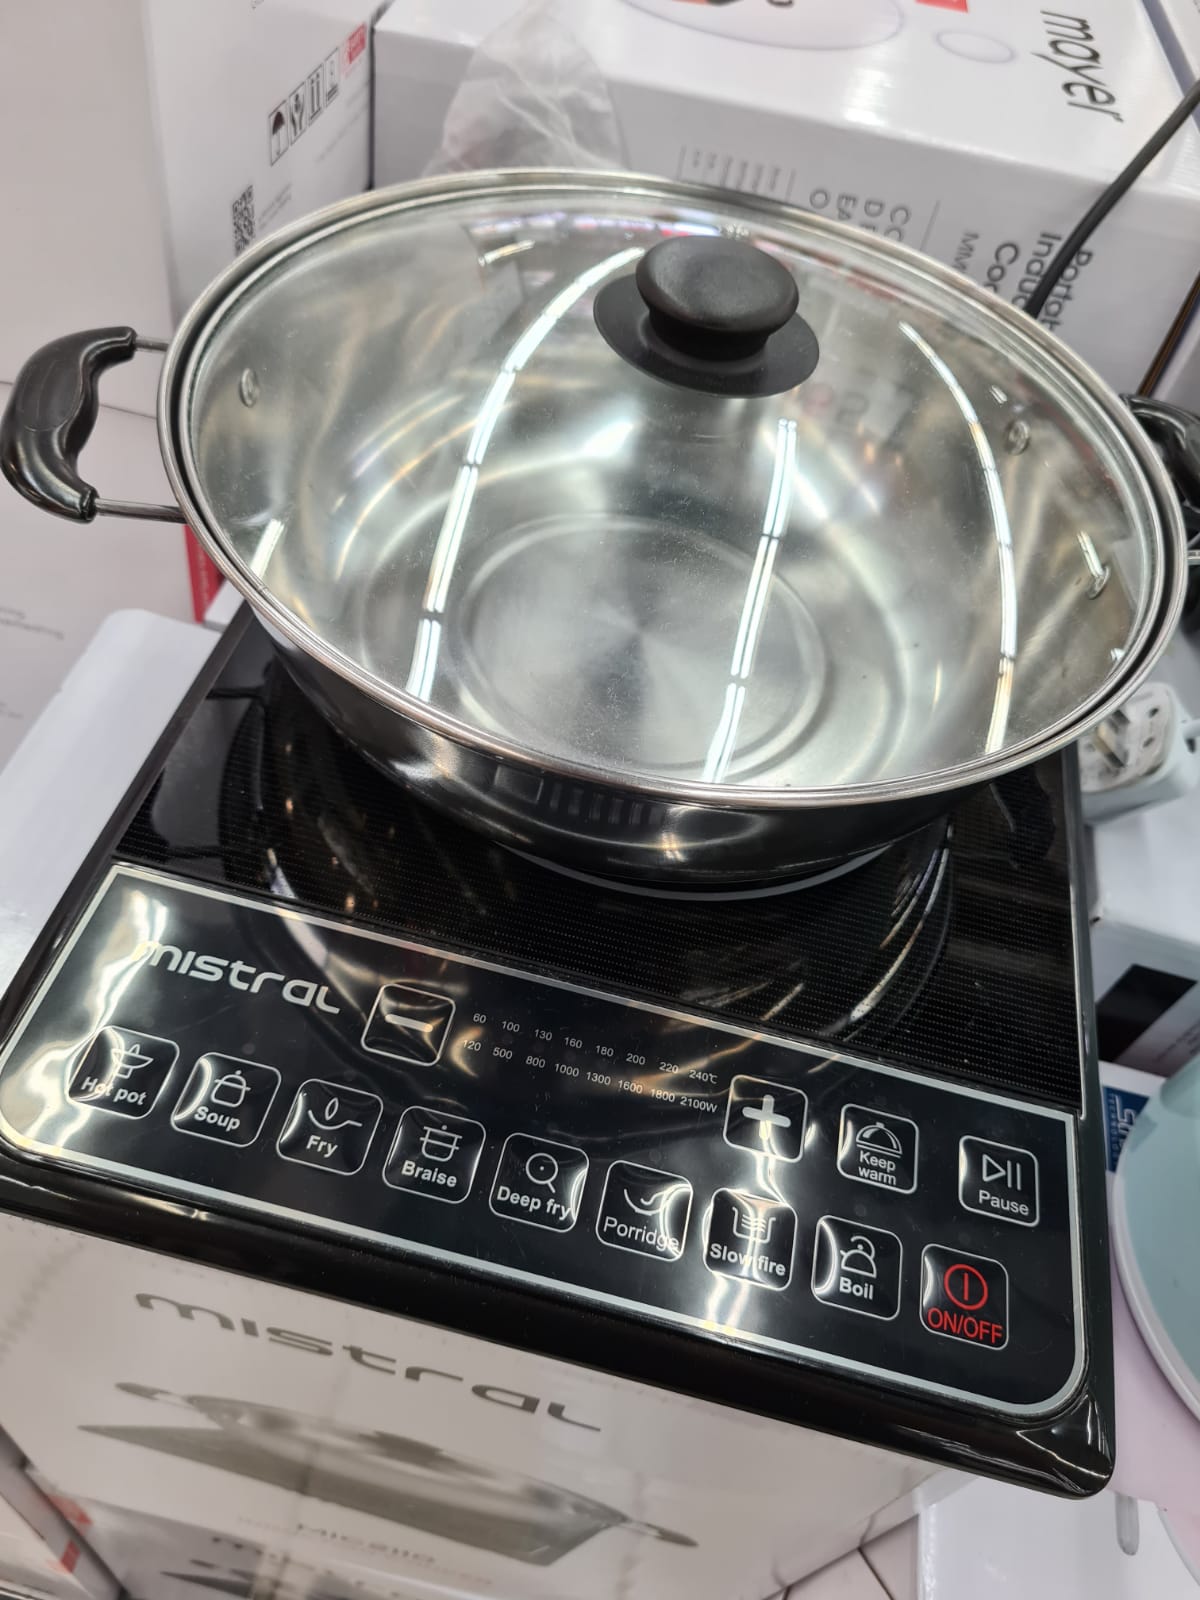
Mistral Induction Cooker - MIC2110 (https://www.lazada.sg/products/mistral-induction-cooker-mic2110-free-stainless-steel-potsoft-touch-control-black-crystal-panel-8-level-of-temperature8-cooking-functions1-year-warranty-i344844306-s782054293.html)
The item was purchased from FairPrice Xtra @ NEX for $65.
Requested features:
- Tactile aids for the visually impaired (e.g. identifying buttons, locating the 'cooking surface')
- Able to 'speak' its current settings
- Light(s) indicating whether the 'cooking surface' is 'too hot'
- (Bonus) Integrated timer
- (Bonus) Integrated weighing scale
Project Team (Basically anyone who helps out at all :D):
- Saad
- Damien
- Lynette
- Shawn
- Ken Wei
- Dexter
- Ryan
- Hannah
- Heiko
Project Journal
Entry #1:
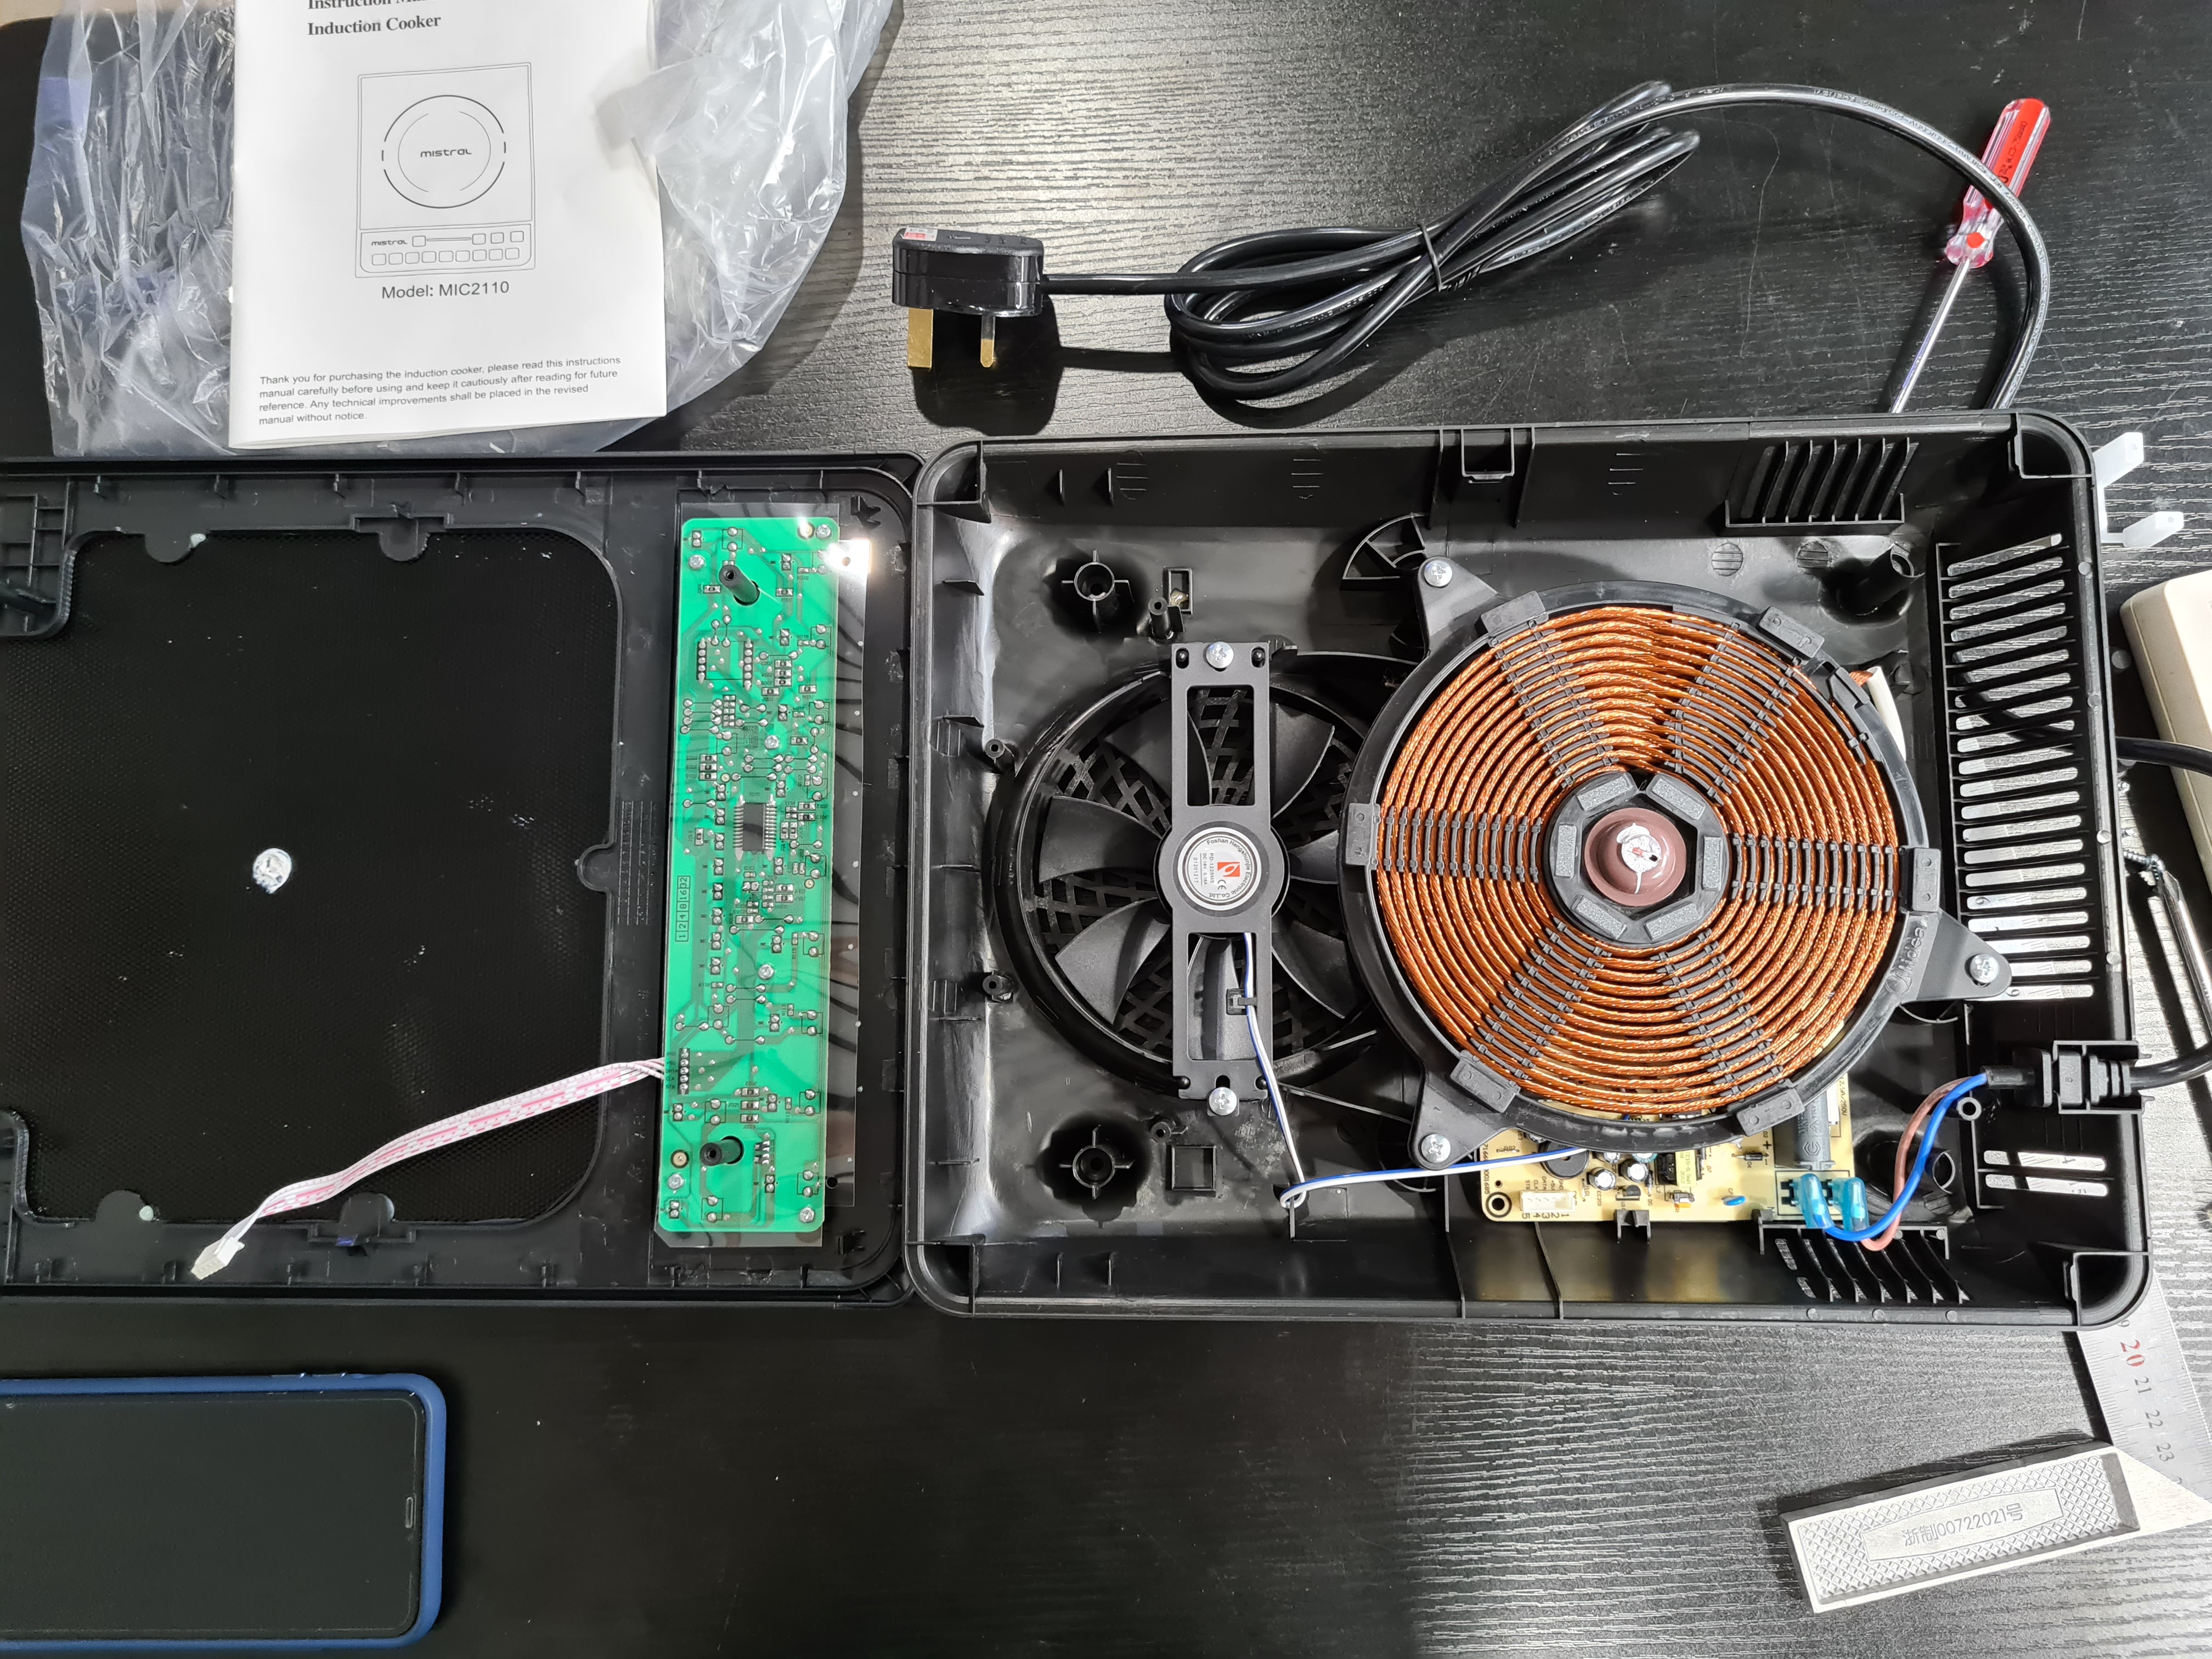
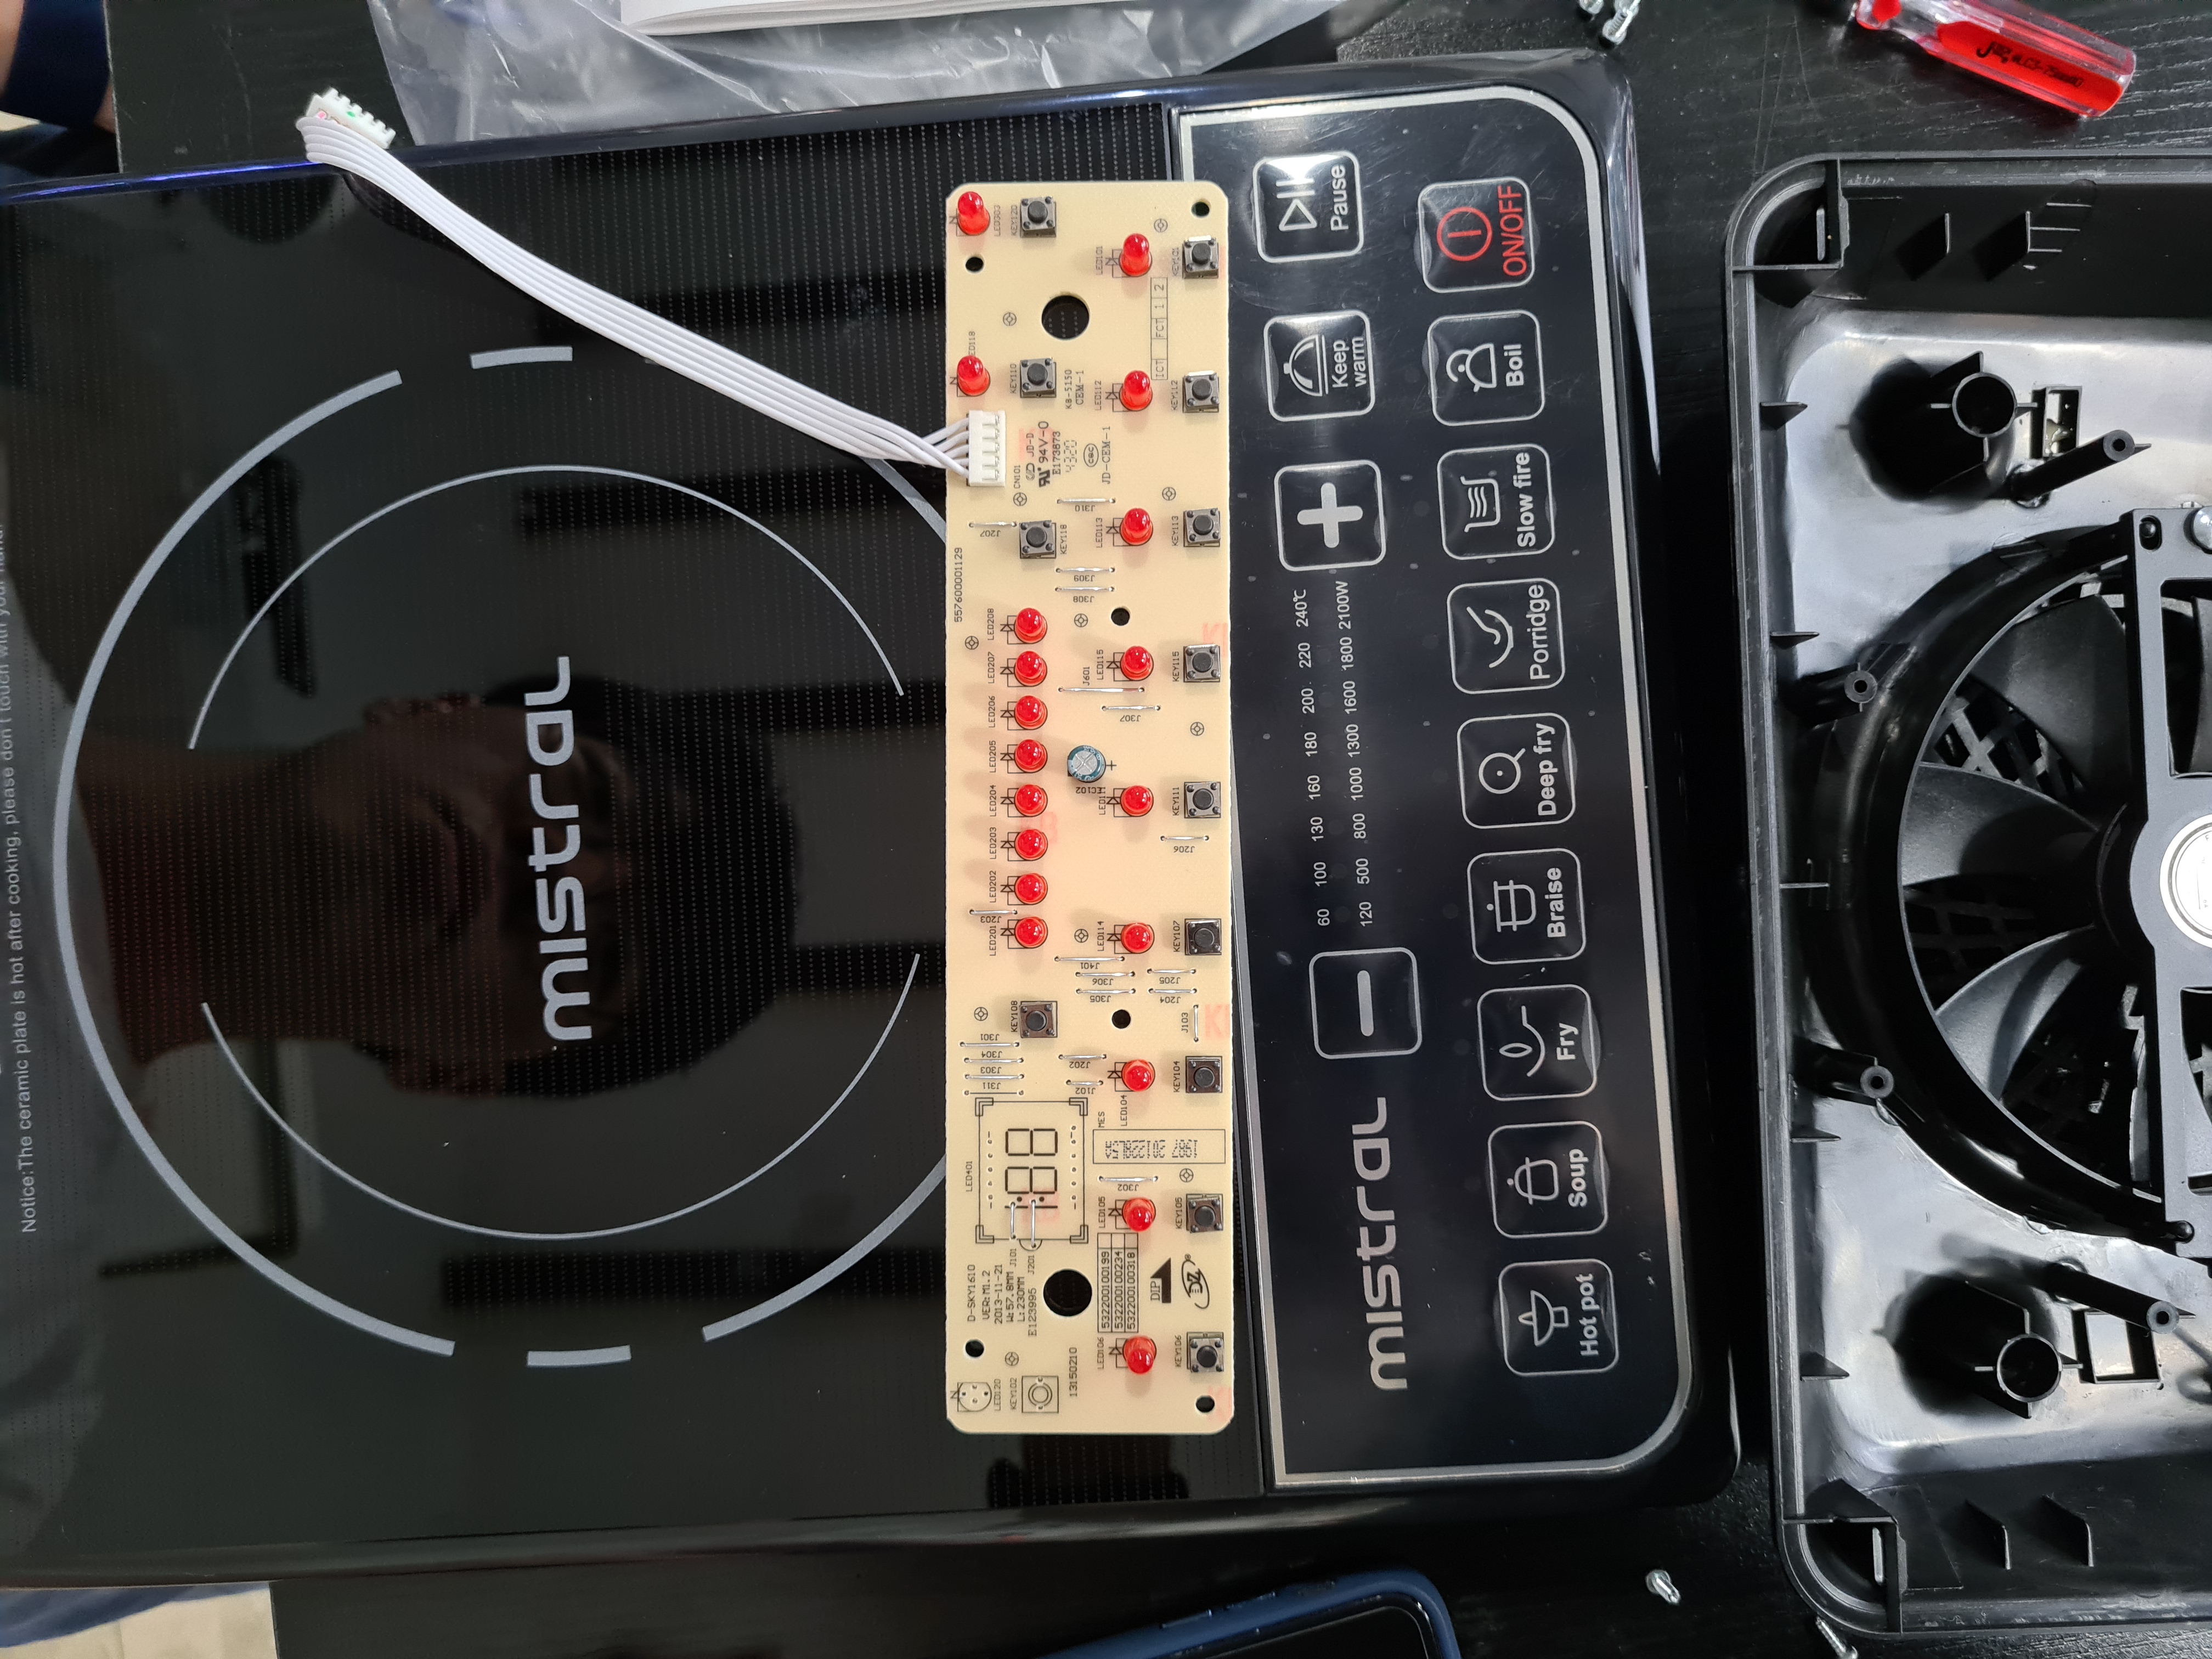
Stripped the hotplate and found that the innerworkings are modular, making the hotplate's control panel easy to separate from the main induction heating machinery.
Saad mentioned that for the 'speaking' function of the hotplate, it'll be very easy to modify the existing control board and take advantage of its attached Integrated Circuit (IC) chip. I personally have no clue how to pull that off but we'll cross that bridge when we get there.
Saad also came up with a quick sketch on how we can pull off the remaining modifications (a clearer and more detailed version will be posted soon (hopefully (I think)))

We also attempted to prepare an Aruduino Nano (clone) but it wouldn't work, after trying several times we decided to stop there and try again next time :')
Entry #2
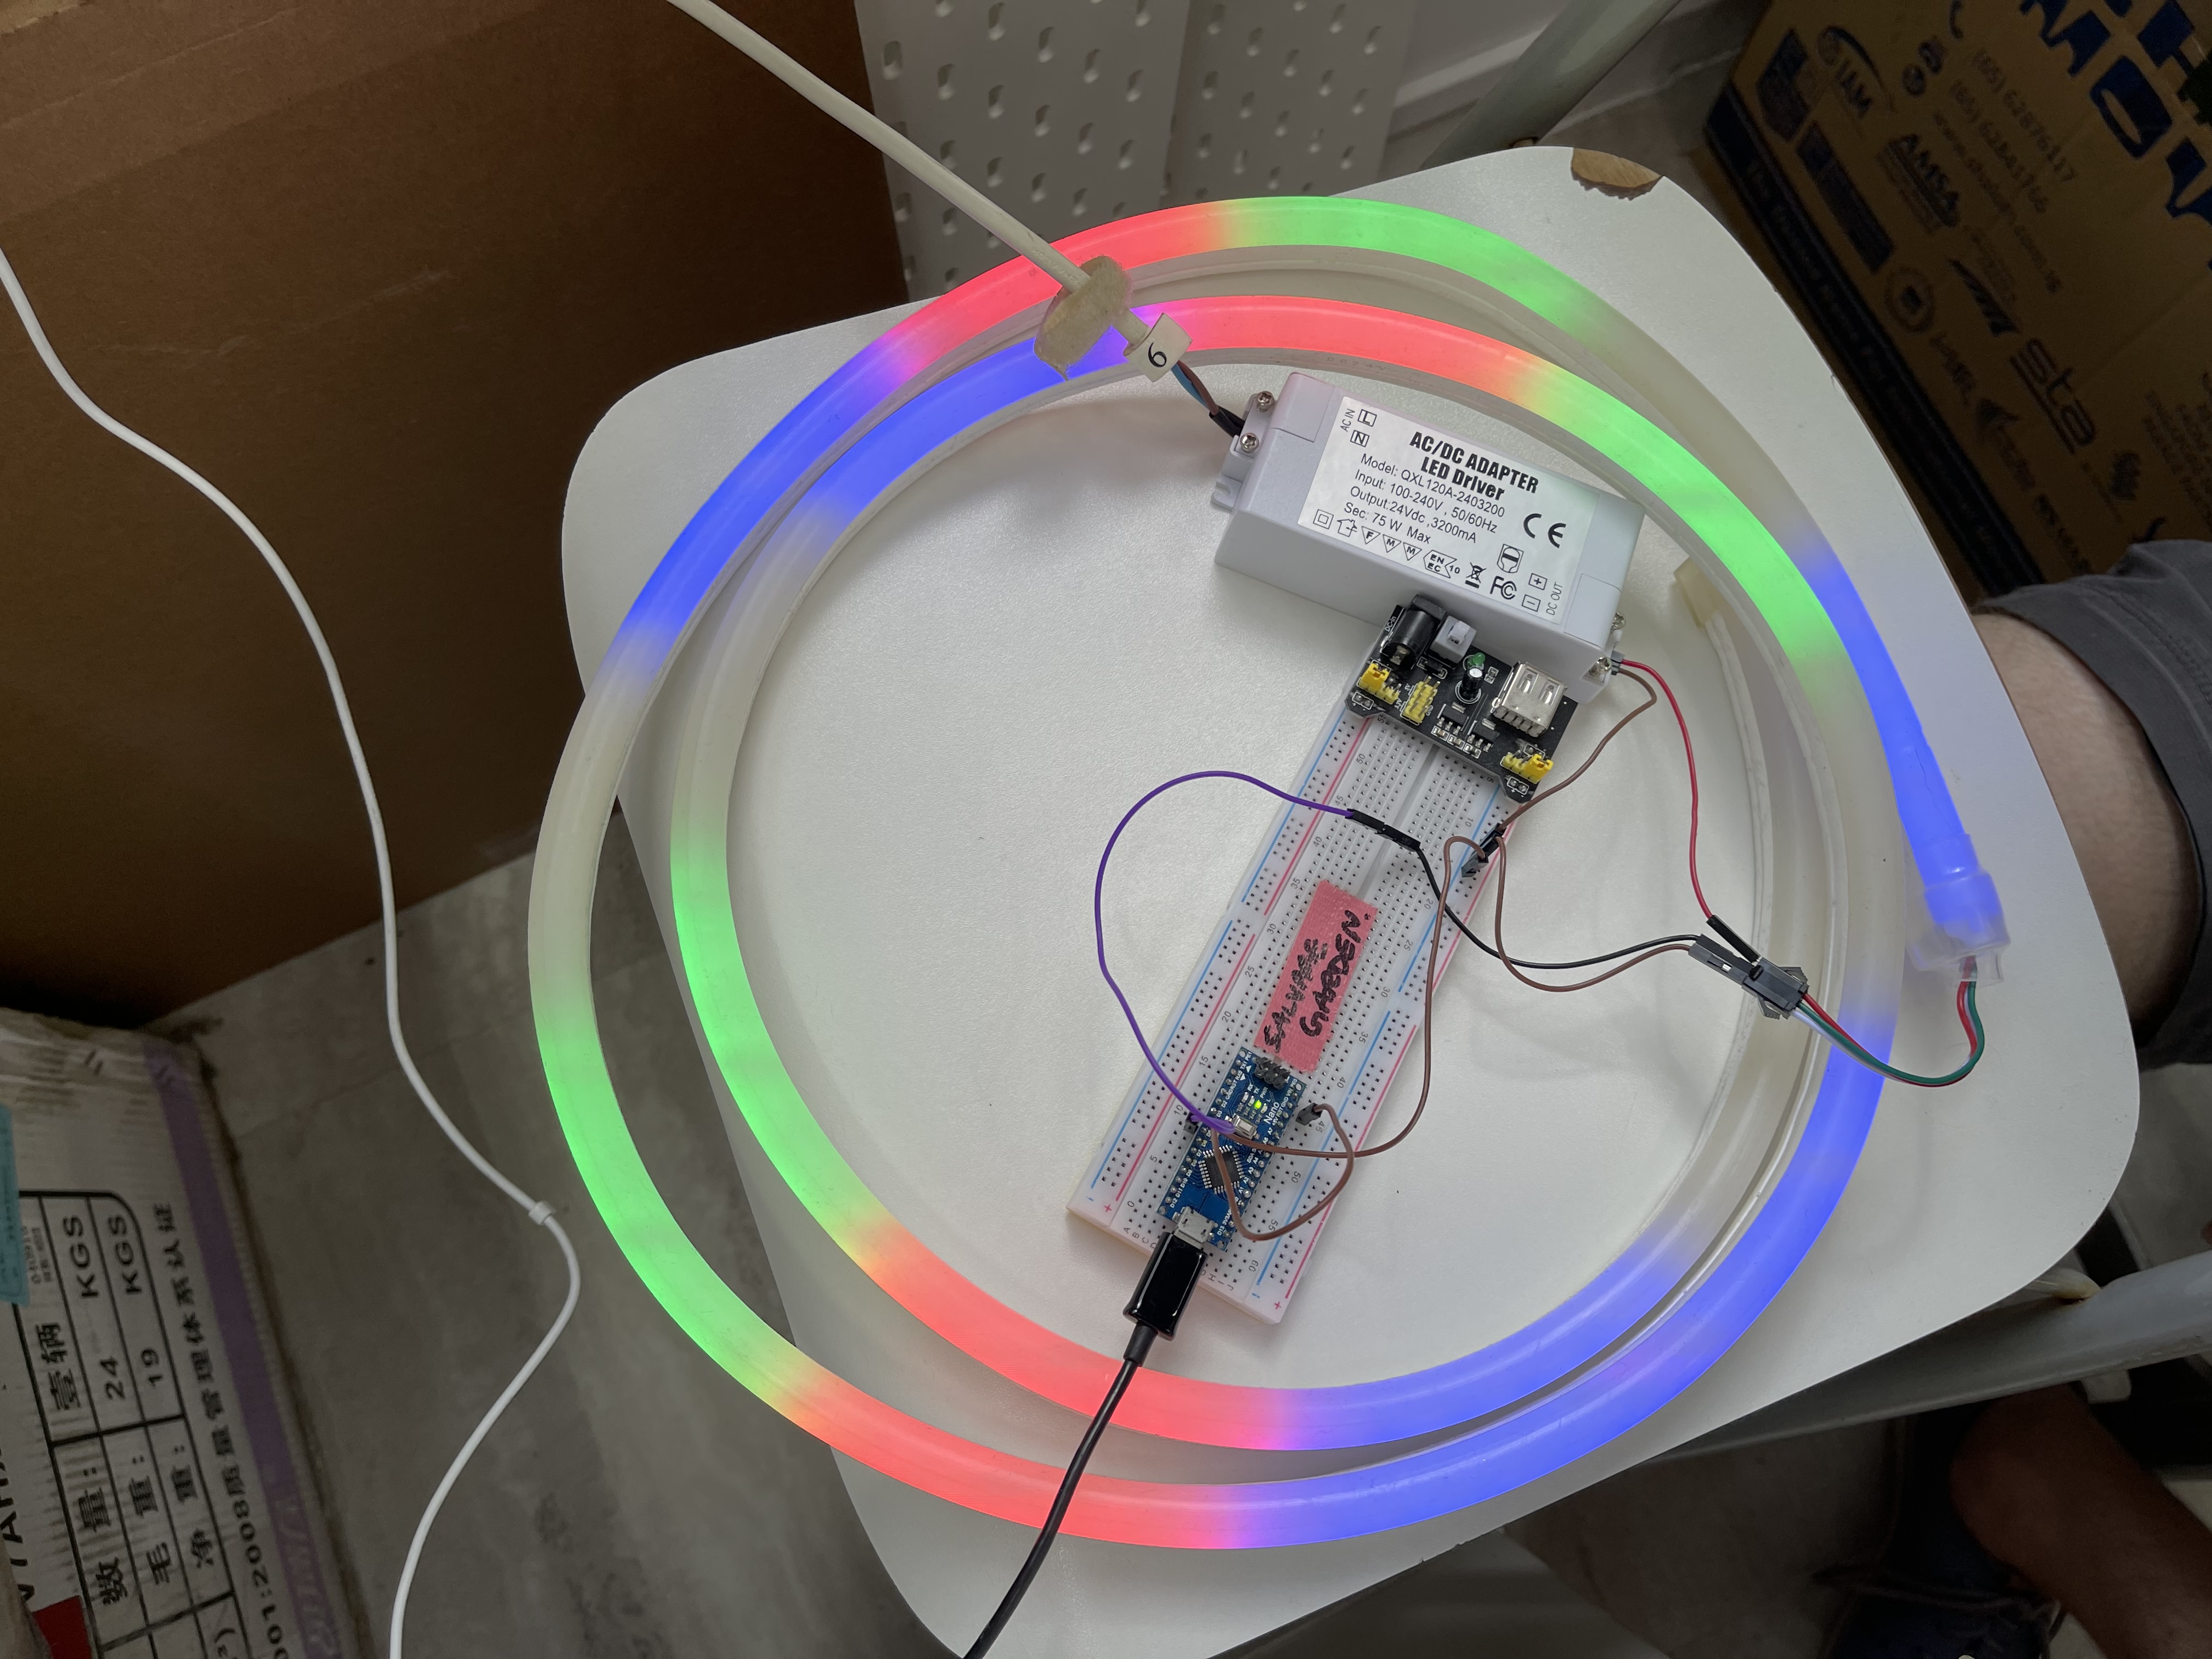
Today, we worked on the application of an LED strip and external digital temperature sensor, both controlled by the Ardunio Nano (turned out that my computer was the problem), for the hotplate.
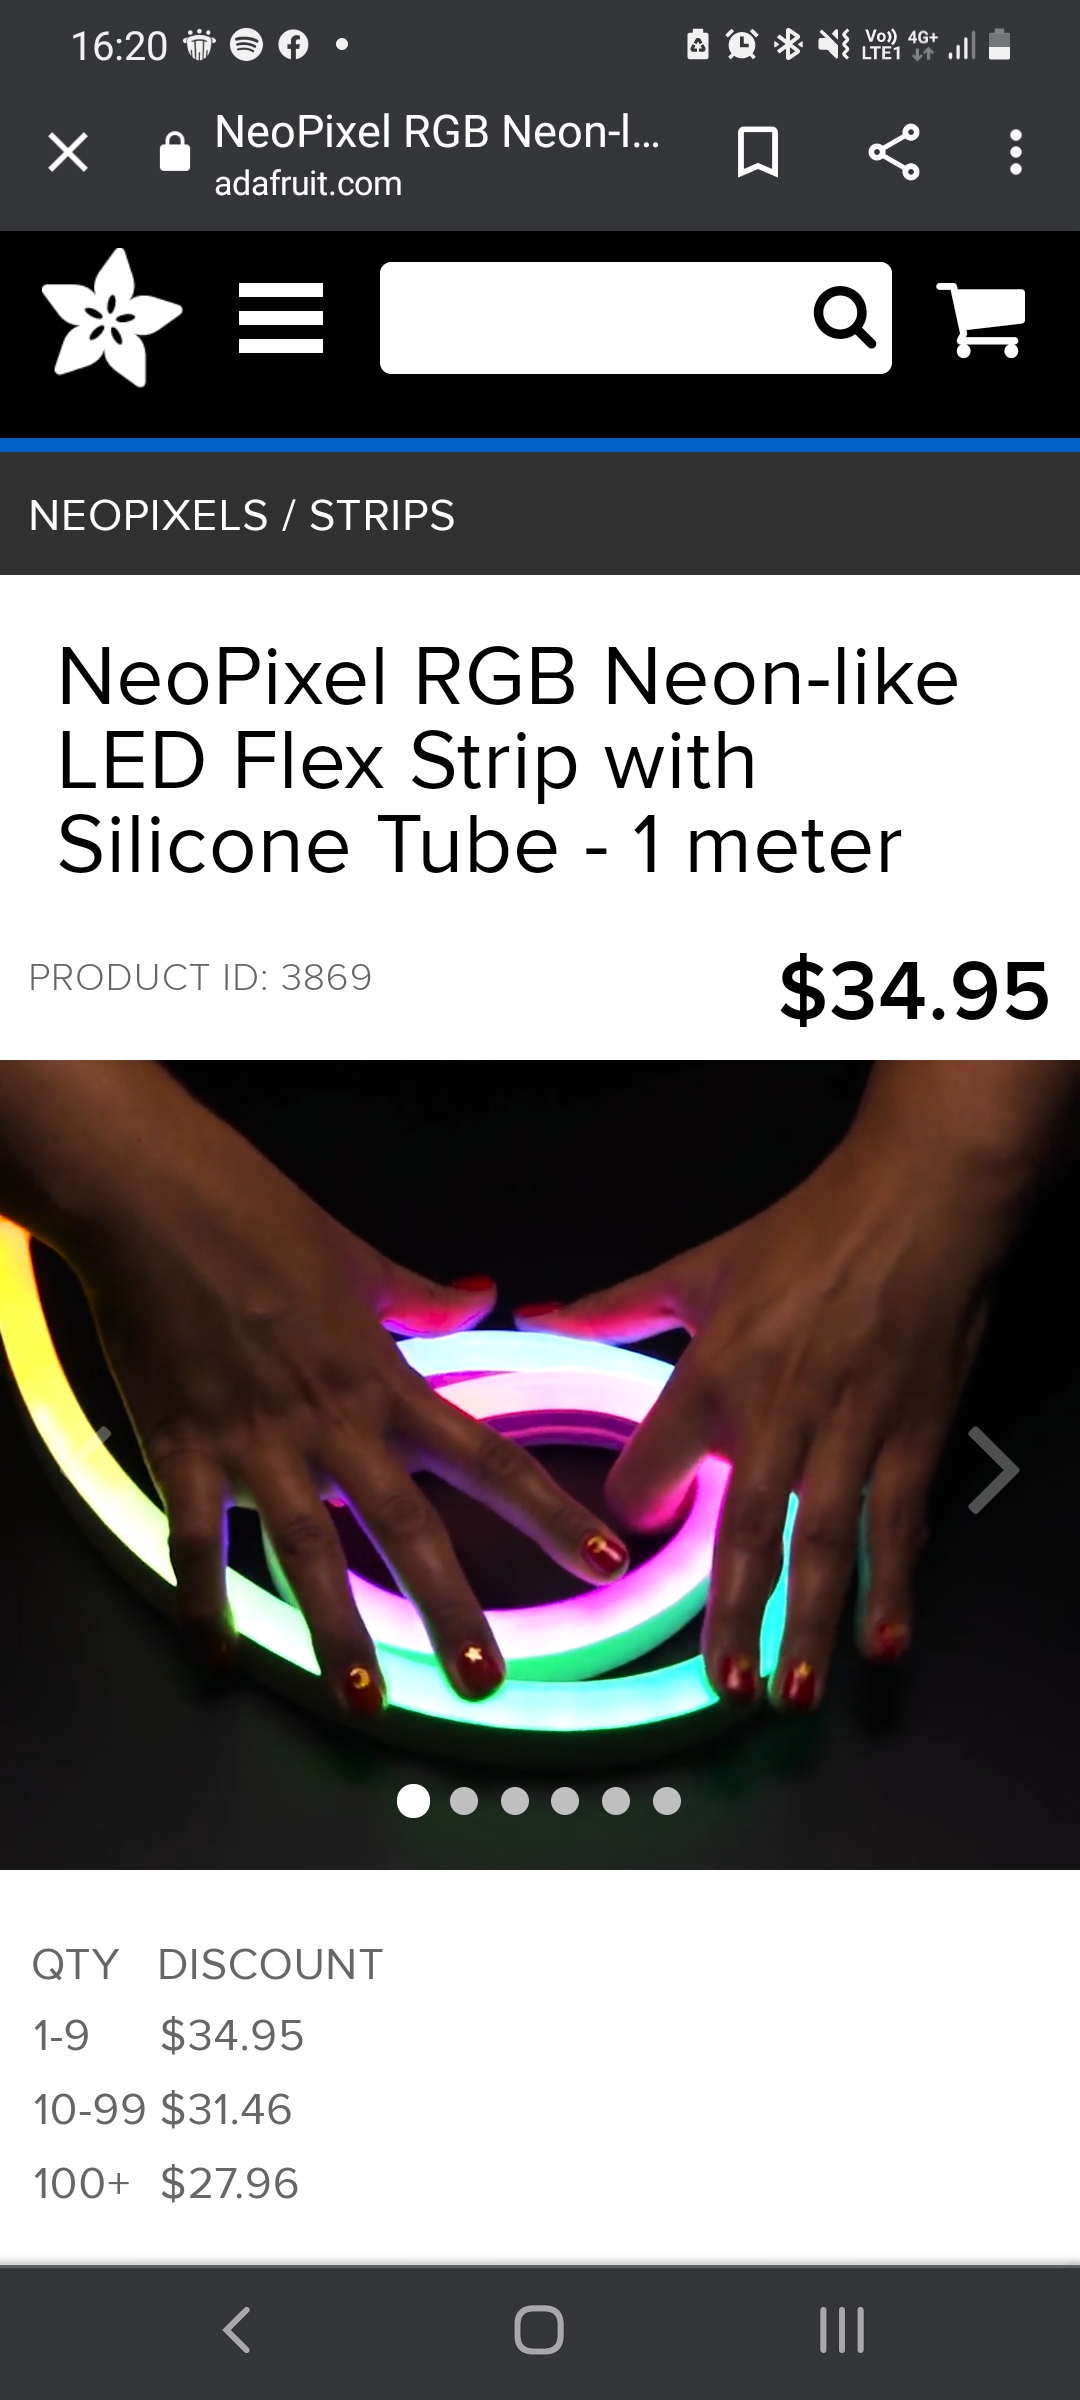
For the LED strip, Saad got a NeoPixel LED strip; for the temperature sensor we used a digital sensor (forgot the exact model name) from an all-in-one kit that Saad had.

The sensor has a small bronze screw that controls the sensor's temperature 'threshold' (not the range of temperature it measures), so we had to crank it to the perfect point where at room temperature it was 'off' and once we put it between our fingers it was 'on' (due to body heat). We took the code from the manufacturer's website and modified it slightly to better suit our purpose, the code is all in the Macbook Pro Saad lent us.
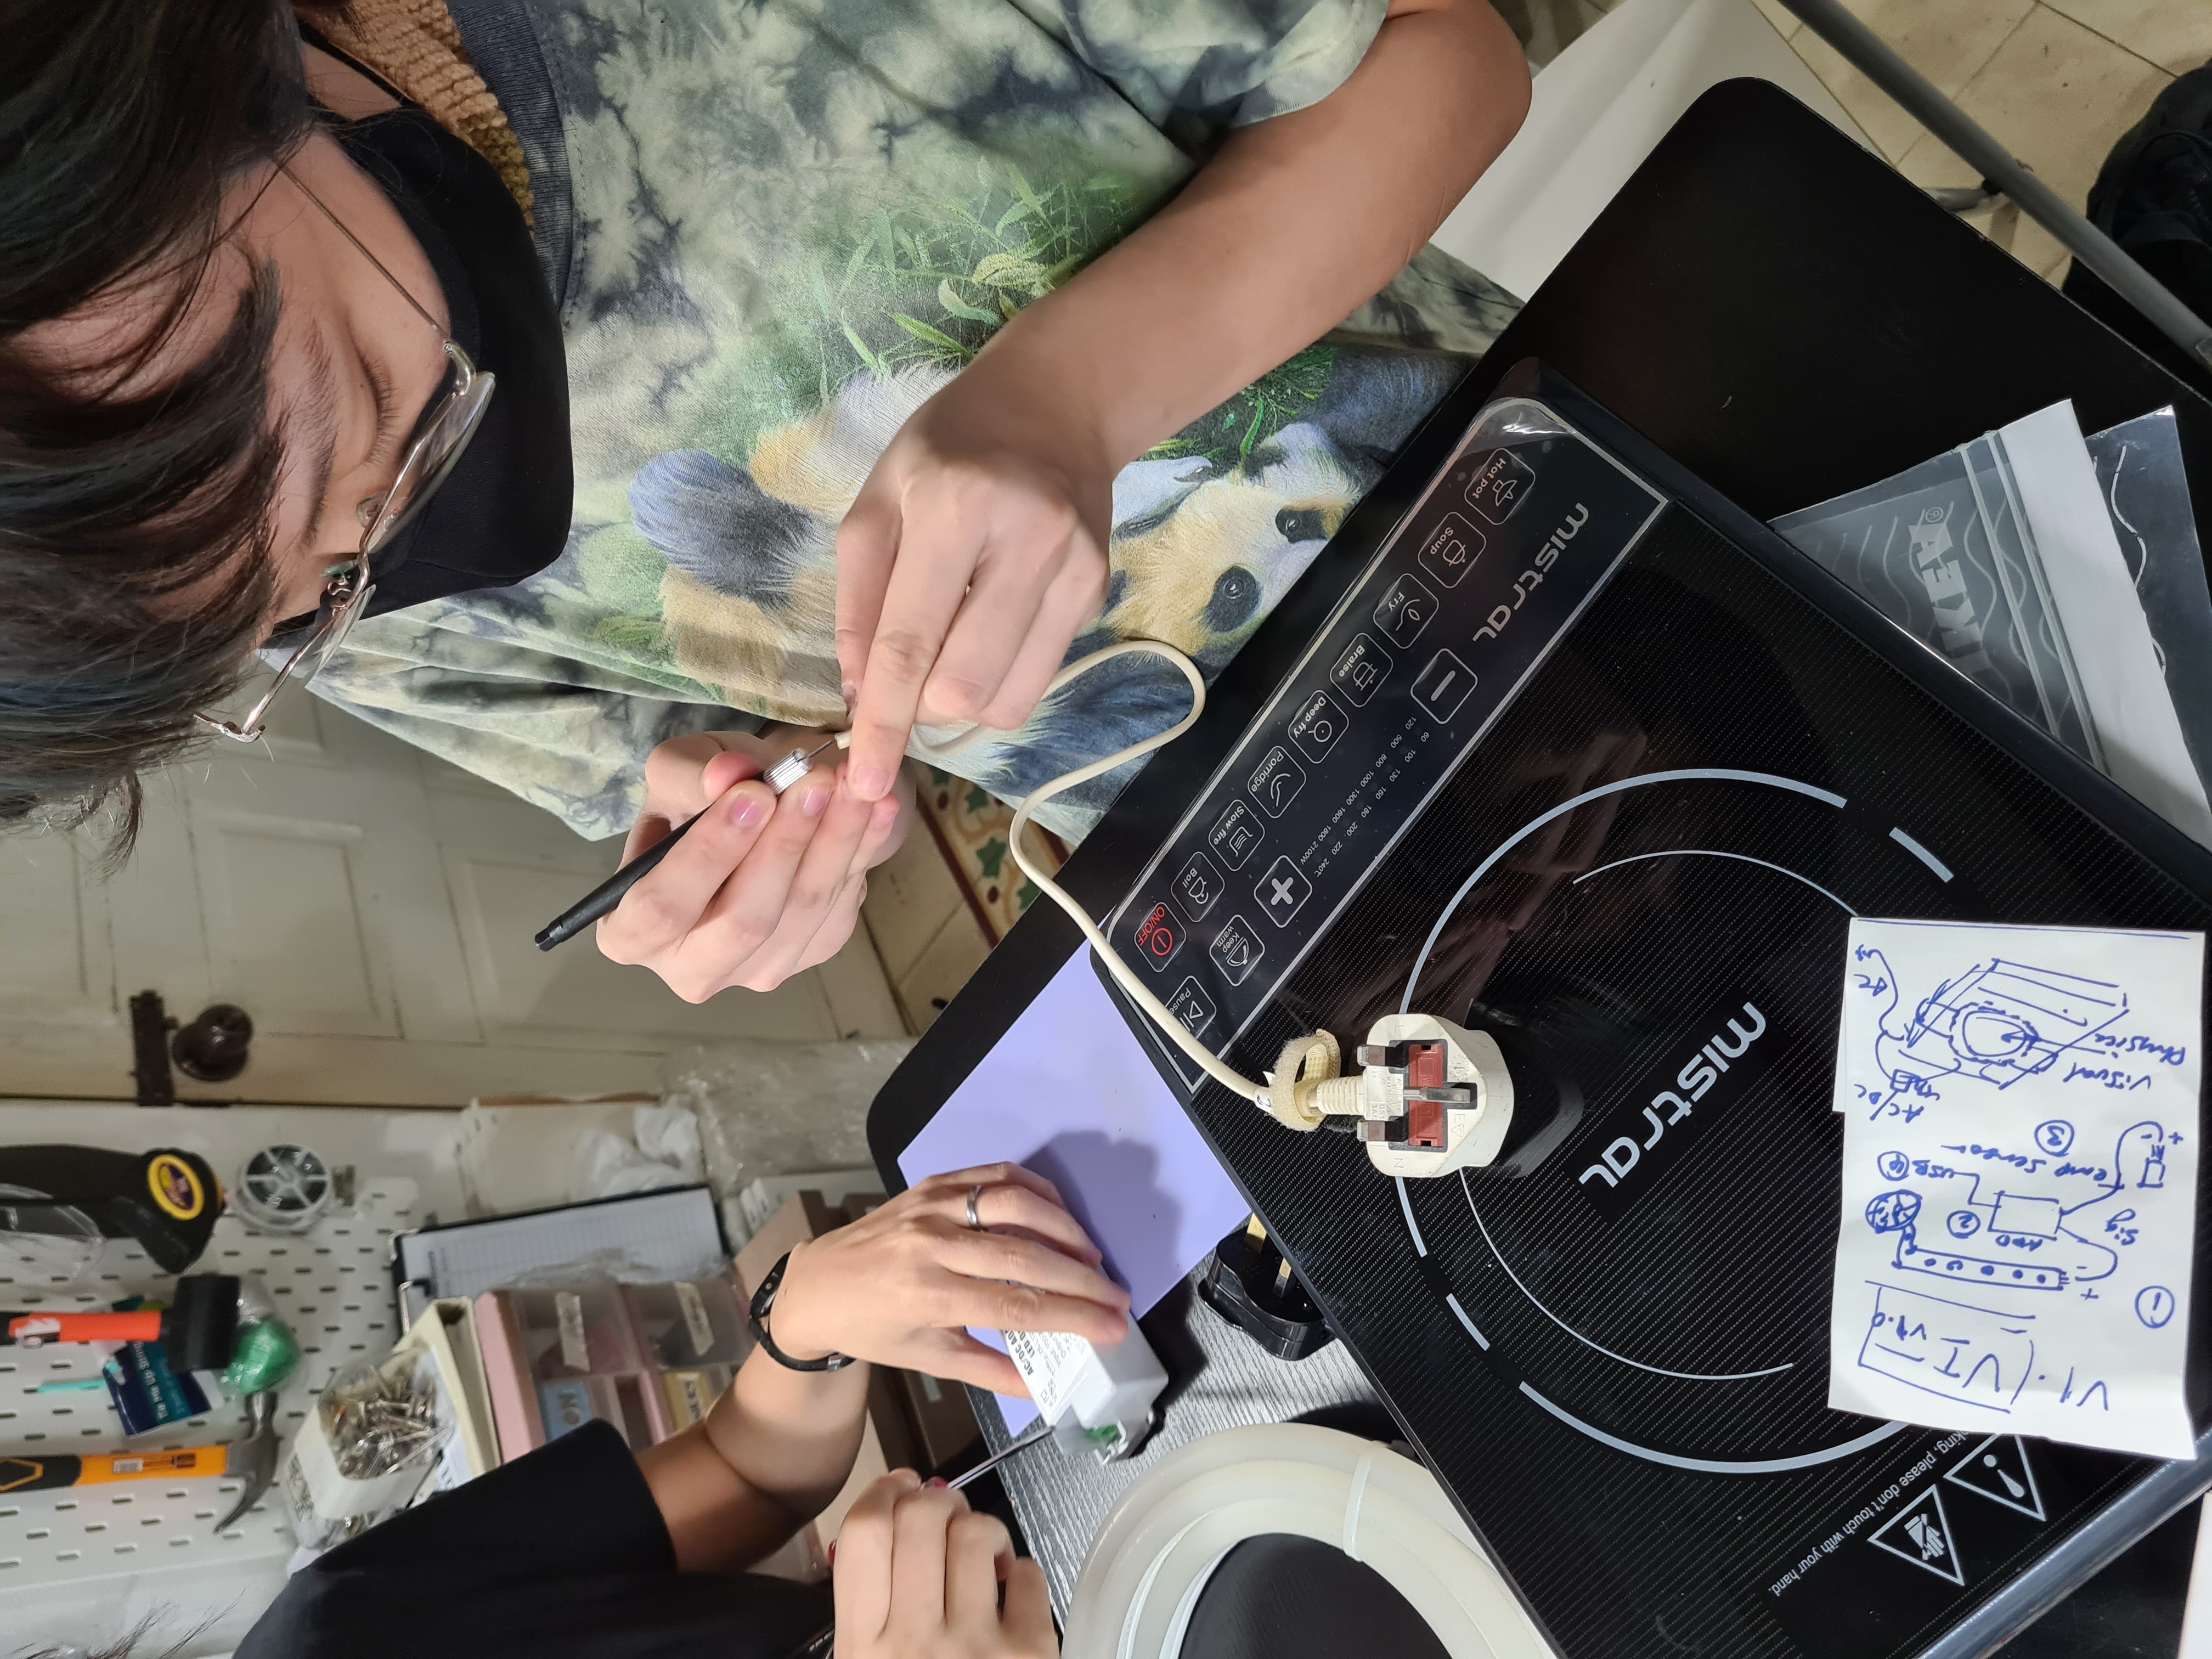
For the LED strip, it requires a 24V power source which the Arduino Nano cannot provide (5V), so we had to create a small AC/DC power supply. This was done by cutting off the tail head of a wall plug, taking its wires and hooking it into a small 24V AC/DC transformer, and then hooking that to the ground and power supply wires of the LED strip - the signal wire is connected to the Arduino Nano.
Something to take note of is that the ground must also be hooked up to the Arduino Nano (so the LED strip has a 3-way connection), otherwise the signal the LED strip received will be 'glitchy'.

The code for the LED strip's code still needs to be worked on. Copying it straight from online doesn't work perfectly, and apparently we need to take note of the exact NeoPixel product we're coding for for it to work properly. Saad knows more about this, so we'll continue working on this next time!
First Iteration
For the first iteration, we were focusing on the light indication. The LED strip should change colour depending on the temperature.
By trying all possible combinations of configuration values for the official NeoPixel Arduino library, we found one that works (see code) and started playing with colours.
For now, we just stuck the temperature sensor to the pot with sticky tape. At first, there were some short circuits, because the pot is conductive (duh), but then we started to get some usable readings.
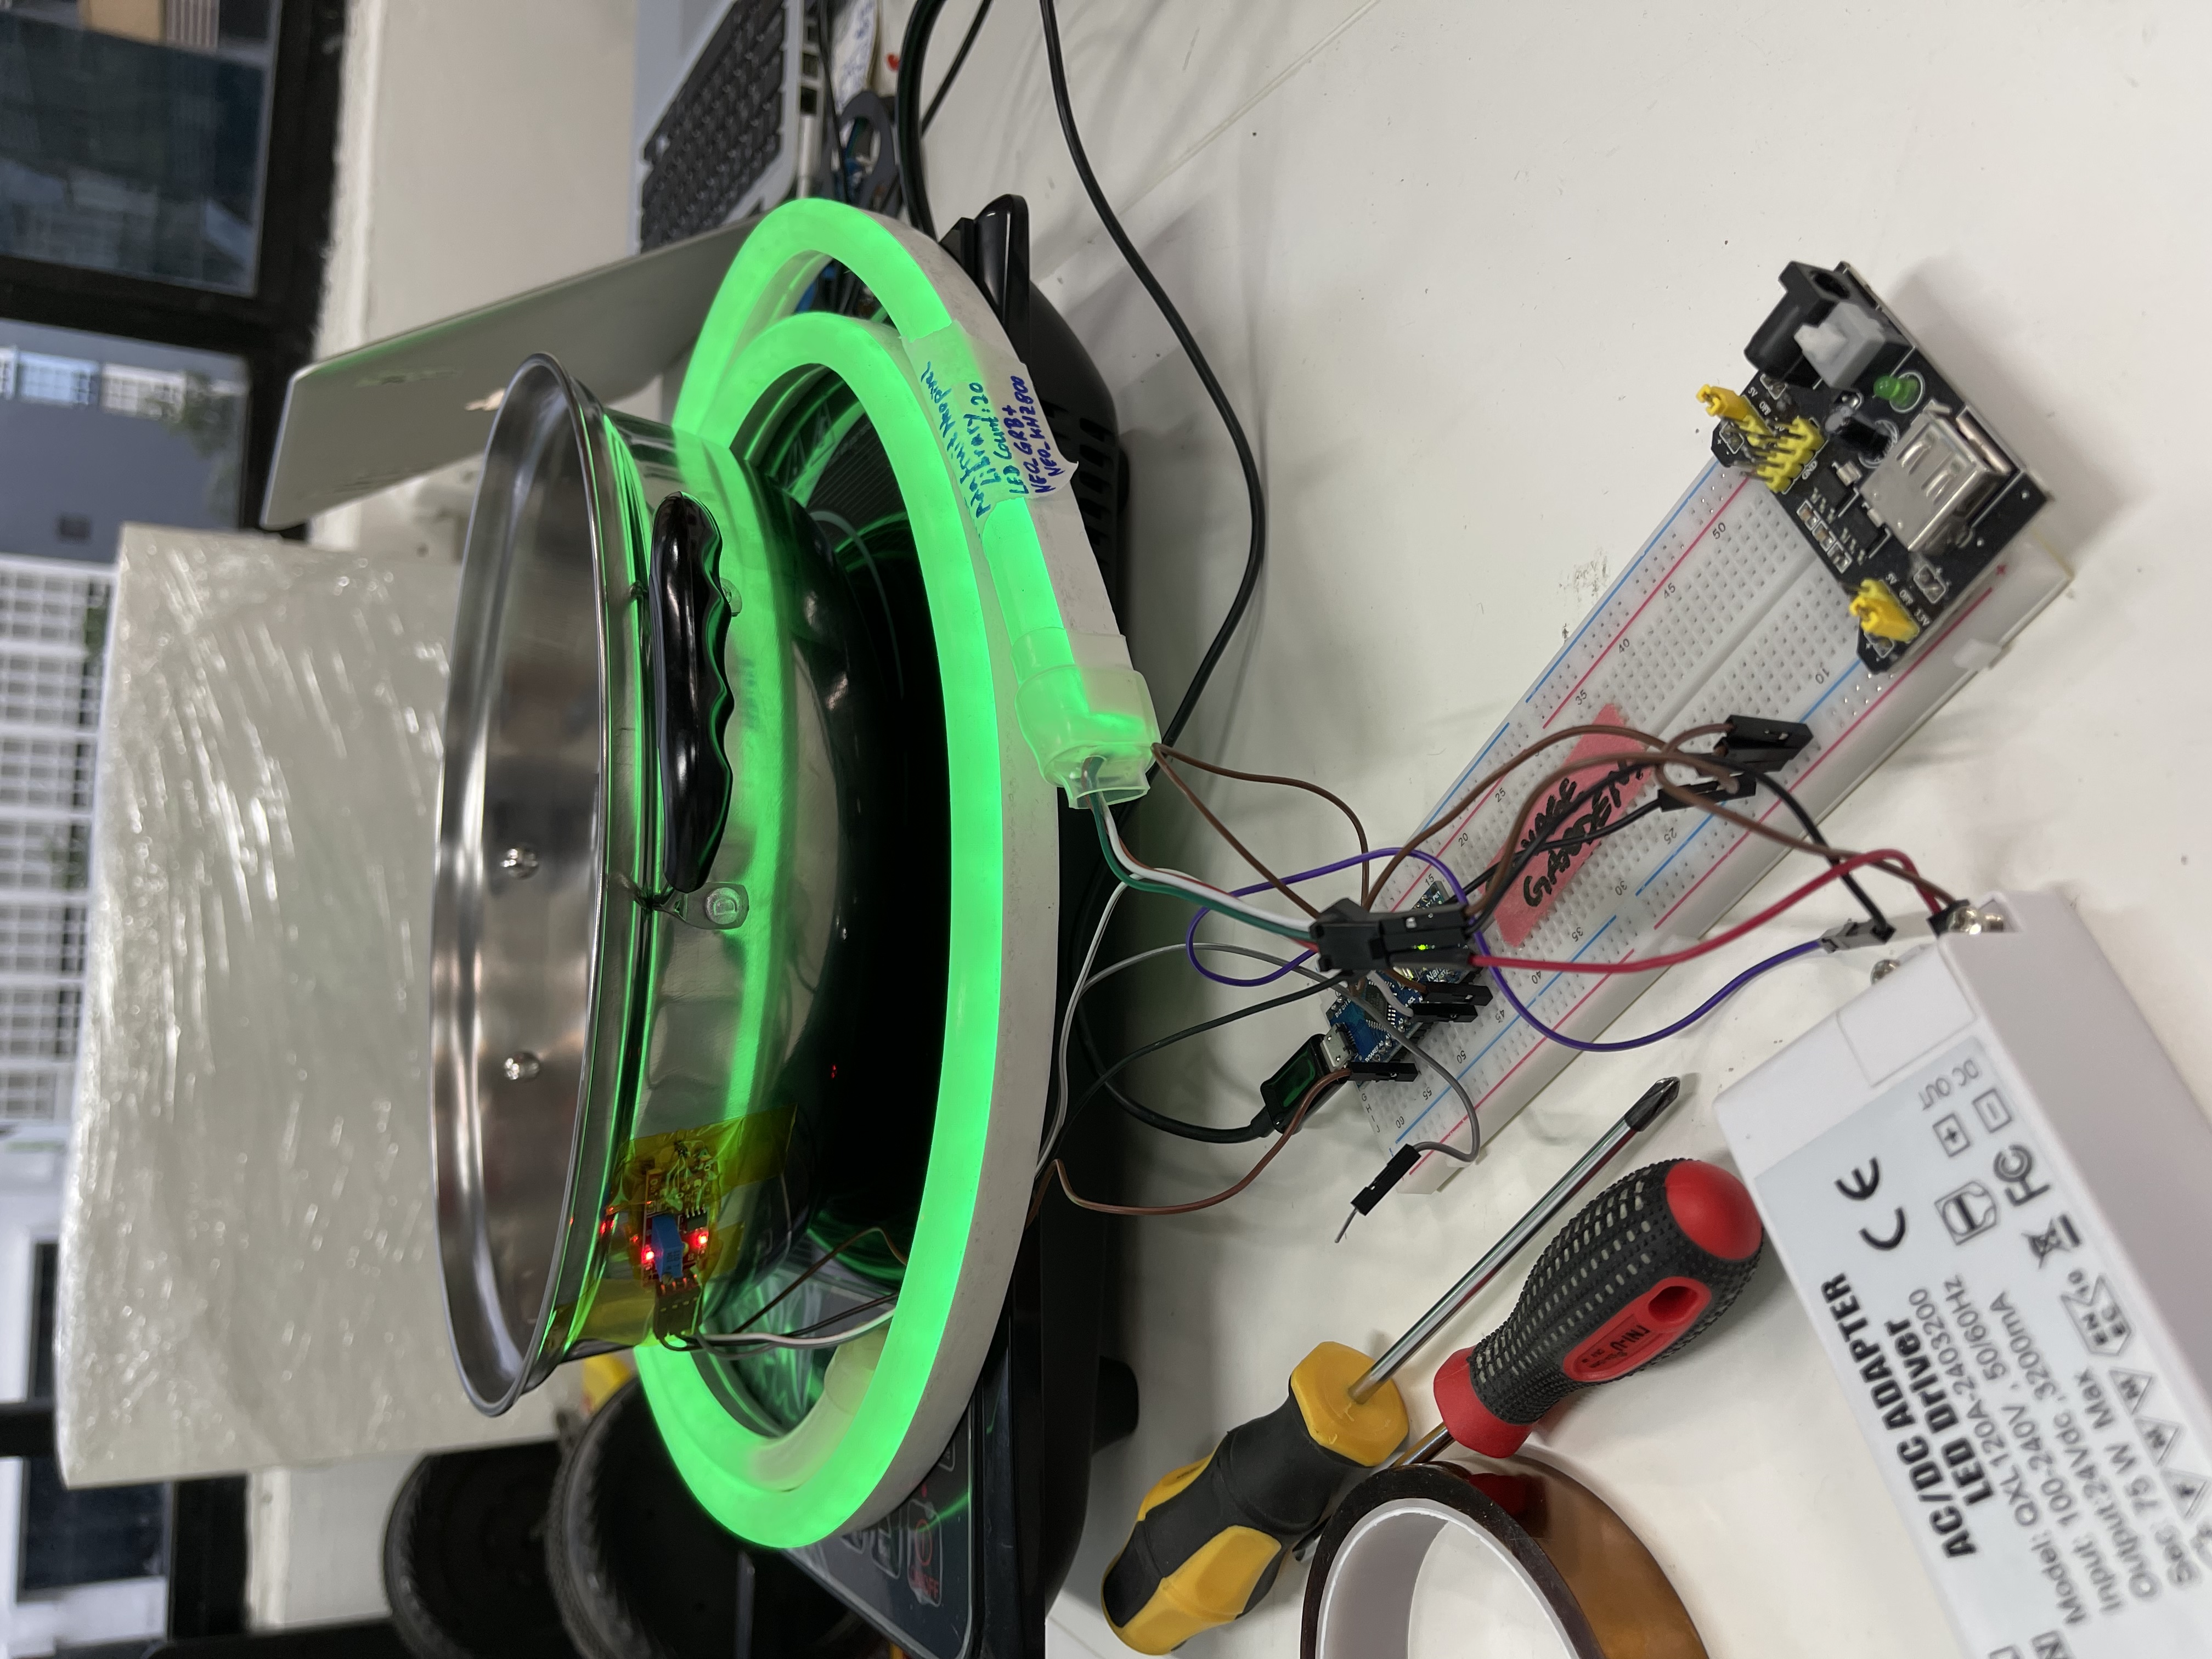
We brought some water to boil in the pot, for testing, and to note down the sensor values at room temperature and when the water starts to boil. Then we tweaked the parameters in the code a few times so that the LED colour transitions from green (or later blue) at room temperature to red when it’s boiling.


Surprisingly this all happened in more or less one session.
We noticed that the light colour is a bit unstable while the hot plate is on. This is probably because the induction hob disturbs the sensor signal somehow, since the sensor is stuck right onto the pot for now. We’re thinking of adding some filtering/smoothing in the software, or to just leave it as is for now, and switch to a contactless infrared sensor for the next iteration.
Functional prototype timelapse
Arduino code for v1 working prototype
Refining the first prototype
Over the next few sessions, we introduced some new team members, tweaked the code a bit and thought about how to improve the prototype. The breadboard version had lots of strange issues because connections always came lose here and there, so it was time to break out the soldering irons!
[insert fritzing layout and soldering photos]
Infrared sensor
For the second iteration, we’re thinking of using some infrared temperature sensor, so that the pot doesn’t have to be wired to the hotplate anymore. There appear to be only a few different sensor models, but they come in different versions, with a different ‘field of view’. The cheapest ones have a ratio of 1:1, which means that the diameter of the surface area it measures is the same as the distance of the surface area from the sensor. The most expensive one has a ratio of 12:1, so e.g. when it’s 12 cm from a surface, then it’s measuring a spot of 1cm diameter. This higher ratio should be better, because then we can mount the sensor further away from the hot plate, and don’t measure any other surfaces within the field of view.
But we were reluctant to buy such a sensor because it’s S$20++. Luckily (maybe), Saad had some handheld infrared thermometer lying around, which has a 12:1 sensor inside, and which had a broken trigger button, so we were allowed to take it apart and salvage the sensor. Interestingly, the handheld thermometer can be bought for less then S$10, which is so much cheaper than the sensor alone!
However, we still need to reverse engineer the sensor inside. Quite possibly, it speaks I2C, like most of the other sensors out there. Another option would be to tap into the LCD connectors and read the temperature that’s shown on the display like that. So far at least we managed to trigger the thermometer from an Arduino pin.
Photos
Photos can be found or added in the following folder:
https://drive.google.com/drive/folders/13B-DLtCxyKMlwh6Mek-_uJpyAqVYIO2H?usp=sharing
PreePot
lower cost alternative available for next prototype:

SGD40 at Giant. Comes with a “PreePot” whatever that is.